how to quilt

My Photo
Name:
Location: Southern California, United States

Friday, December 22, 2006


Add Interest to your Quilt with Simple Sashing


Your blocks can range from the very simple to the very complex, and they will still benefit from sashing.

Sashing is what goes between the blocks in a quilt. Like quilt blocks, sashing can be very simple or it can be as complex as your quilt blocks. And some quilts have no sashing at all.

Once you have your quilt blocks made, it's time to put them together. Yes, you could just sew them right next to each other.

A very effective, yet simple way to add some interest to your quilt is to add some simple sashing in either a solid color of fabric or a fabric with a print.

Your fabric choice may be determined by what your blocks look like and what you want the focus of the quilt to be.

If your blocks are fairly simple, you may decide to used some very interesting and exciting fabric for your sashing. If you want people to look at the blocks more than the sashing, then choose a solid fabric for the sashing.

When I made the quilt pictured above, I wanted the focus to be the hearts, not that sashing, so I chose fabric that made the hearts stand apart from each other, but did not cause too much attention to be taken away from the hearts.

For other examples, click here for the full article about adding sashing to your quilt.


Happy Quilting!

Penny Halgren

Penny is a quilter of more than 24 years who seeks to interest new quilters and provide them with the resources necessary to create beautiful quilts.

www.How-to-Quilt.com
Inspiration and Education for Beginning Quilters

www.Rag-Quilt-Instructions.com
Fast, Fun and Funky Quilts

www.Fabric-Postcards.com
Quilt Greetings Across the Miles


Tuesday, November 28, 2006

Now, A Simple, Video-Based Guide That Teaches You Step-By-Step How To Make A Beautiful Quilt - A Treasured Family Heirloom for Future Generations to Enjoy. . . 100% Guaranteed


- - - a message from m. mouse, the how-to-quilt.com siamese cat:

greetings, quilter -

just the other day, i let the cat out of the bag and told you about penny’s new video – a complete step-by-step guide for making a simple 9 patch quilt.

in this video and accompanying printed guide, you will see every step – from start to finish for making this brand new quilt block design of a robin sitting in a nest.

ever since then, the fur has been flying. my buddy, anita, pluto (the other how-to-quilt.com siamese cat), and p-nut (the boxer dog) have been scurrying around packing and mailing when penny isn’t looking.

me, well, i’ve been goofin’ off.

my official job is to distract penny so she can’t see all of these dvds fly out the door. i have to admit i’ve been masterful. after all, it is what i do best – plop down in the middle of the latest quilting magazine so penny can’t see the dog quilt, flip my furry tail in her face to remind her it’s
dinner time …. you get the picture.

anyway, these new step-by-step videos are all the rage. quilters from all over the world are ordering them. and not just beginners. intermediate quilters also have figured out that getting a look inside penny’s quilting house can give them inspiration.

you see, penny’s quilting house is just like a lot of other quilter’s homes – stuff spread out all over, fabric in the closet, sewing machine on a card table in the front room, ironing board in a bedroom at the back of the house – not a perfect ‘just for sewing’ space with all of the fabric organized by color and neatly folded and stacked.

thing is, we all live there among all of that fabric, cutting and sewing. and out from the clutter come some amazing quilts. if we can do it, you can too.

and here is your chance to see exactly how to do it. follow an experienced quilter from start to finish. see firsthand just how to sew perfect half-square triangles, measure for borders that
will square up your quilt, and sew a hidden sleeve for hanging your quilt.

in a hurry? you can get an electronic download of the guide – without the dvd or any of the other goodies, if you prefer – at a much reduced price. check it out:

http://www.how-to-quilt.com/robinsnest.shtml


happy quilting!

m.mouse, the how-to-quilt.com siamese cat

p.s. just want the printed version of the guide? we’ll deliver that, if you’d like:

http://www.how-to-quilt.com/robinsnest.shtml

p.p.s. must excuse that i don't type in caps - my tail hasn't perfected punching the shift key while i type. it's kind of like quilting, i guess - you get better with practice.

p.p.p.s. jump on this one quick. i can't believe how fast they are selling. penny already had to place reorders for both the dvds and the quilting goodies that go along with it. don't miss out - besides these make great holiday gifts.

Thursday, November 16, 2006

Thanks to many of you who responded to my call for quilting questions. It will take days to respond to them, so you can look forward to getting useful quilting information for days and weeks to come.

Since I received several questions about the difference between quilting using a hoop versus using a quilting frame, I decided to 'spout off' on that topic first.

You will find the complete answer here:

http://www.how-to-quilt.com/articles/5005-hoop-or-quilt-frame.shtml


oooo - sorry that's such a long web address. You may need to copy and paste it into your
internet browser in order to get the whole thing.

The short answer is 'It depends' I love that answer, and it usually is the answer.

In this case one consideration is whether you will have a group of quilters working on the same quilt at the same time. If so, you will need a frame.

A second consideration is your ability to stitch in many different directions. With a hoop, you can turn your quilt around as the direction of your quilting changes. With a frame, you need to turn you or your hand in order to change direction of your stitching.

On the page, you can see pictures of different hoops and a quilting frame:

http://www.how-to-quilt.com/articles/5005-hoop-or-quilt-frame.shtml

Plus get the detailed explanation - at least from my perspective!

Happy Quilting!

Penny Halgren
www.How-to-Quilt.com
Inspiration and Education for Beginning Quilters

www.Fabric-Postcards.com
Quilt Greetings Across the Miles

www.Rag-Quilt-Instructions.com

Fast, Fun and Funky Quilts

P.S. For Postcard Posse Participants - the next roundup starts now, and ends on December 7, so I can have them to our friends in Idaho by December 10. I'll be getting information and patterns out soon.

In the meantime, you don't need to wait - the theme is the Holidays - whatever you
celebrate!

Get all of the details here:

http://fabric-postcards.com/christmas.shtml

Tuesday, November 14, 2006


Quilting Basics - Beginner Quilting Block

Most patchwork quilts are made using a basic unit called a Block. Generally blocks are square, although they can be any shape the quiltmaker wants them to be – rectangles, triangles, hexagons, diamonds; all are fairly common. Quilts are usually made with the same shape block throughout, however, it is possible (and more interesting, although more challenging) to include more than one shape block in a quilt.

Quilt blocks are made up of smaller units – or patches. Since there is no set number of patches in a block, the design (or pattern) of the block is created with the placement of the shapes in the patches and the colors of fabric used in each shape.

A very common quilt block is a nine patch – a simple square block made up of 9 smaller squares. Because this block is so easy to make, it is one of the more popular quilt blocks for beginning quilters. All of the stitching is along straight edges, and all of the patches are the same size. What makes the nine patch interesting is the placement of color within each block as well as what the whole quilt looks like when you place the blocks next to each other.

Nine patch blocks are also great for scrap quilts in a totally random design

Using four basic shapes, you can make hundreds of different quilt blocks. As quilting has developed, many more shapes have been added, but as a beginning quilter, it is a good idea to start with these four basic shapes.

For more details and pictures of the shapes, check out:

http://www.how-to-quilt.com/articles/1101-beginner-quilting-block.shtml

Happy Quilting!

Penny Halgren
www.How-to-Quilt.com
Inspiration and Education for Beginning Quilters

www.Rag-Quilt-Instructions.com
Fast, Fun and Funky Quilts

www.Fabric-Postcards.com
Quilt Greetings Across the Miles

Thursday, October 19, 2006

Quilter's Questions


Q: Before i found ya'll, i had a friend helping me. we put the quilt together with the batting and the backing the same measurements as the quilt. I've got it on an old rack now, but i am hesitant to start the quilting, afraid that the edges will not be good when i finish. what should i do?

Laura,
West Jefferson, NC

A: You raise an excellent point. When you quilt, your quilting stitches will tend to make the quilt top, back and batting get somewhat smaller, and generally at different rates.

At this point, I would add fabric to the backing and add batting. Assuming that the quilt is basted together, the first step is to remove enough basting so you can work with the outside 2-3” of the quilt back and batting.

The first step would be to add backing material. If you have more of the same material, you could add about 3” to each side of the piece. If not, you could add a contrasting piece of fabric to the backing, just like you would add a border to a quilt top. Once those pieces are added, be sure to press the seam allowances flat, and probably toward the bigger part of the quilt.

Next is to add batting. This, too, is relatively easy, following the instructions in this Article about Piecing Batting.

Once you have those extra pieces added, you’re ready to quilt without any worries. Baste the top, batting and backing. You will have extra batting and backing sticking out from your quilt top. I would baste those to each other. Normally I don’t do that, but since your batting is pieced, you will probably want to secure it, so the piecing is less likely to come out.

Once your quilting is complete, trim off the excess batting and backing as you normally would. It is likely that there will be just a small amount of the extra backing that actually remains in your quilt. I would use binding to cover the extra little strip.

The easiest way is to make your own binding. Before cutting fabric for the binding, measure how much of the backing you want to cover up. Add at least 1½” to that measurement. That will give you enough fabric to sew a ¼” of binding on the front, fold it around to the back, and secure it well past the seam for the extra fabric you pieced onto the back.

Hope that helps!

Happy Quilting!

penny halgren

Penny Halgren
www.How-to-Quilt.com
Inspiration and Education for Beginning Quilters

www.Rag-Quilt-Instructions.com
Fast, Fun and Funky Quilts

www.Fabric-Postcards.com
Quilt Greetings Across the Miles

Tuesday, October 10, 2006


Q: Is it best to use matching or contrasting thread?


A: Like so many other things about quilting, it depends….


For sewing patches together, I usually use white or black thread. Black only if all of the fabric in the quilt is dark. For everything else, I use white. You could spend your life changing thread for each block, or using two different colors – one for the top and the other for the bobbin. Unless you press your seams open (which I don’t recommend too often), the thread won’t show, so I make it easy, and just use the same color all the time.


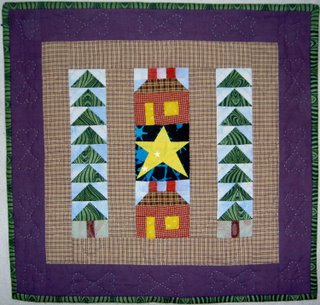
For quilting, if you would like your stitches to show, use contrasting thread. If you want the pattern to show, but not necessarily the individual stitches, then use matching thread. In the little wall hanging shown here, you can see how different the quilting stitches look in the solid fabric and in the fabric with a pattern. If I had wanted the stitches to show more in the fabric with the pattern, I probably would have used a contrasting thread – possibly black.

Find more examples and close-up pictures of the quilts on our site:

http://www.how-to-quilt.com/articles/6005-matching-thread.shtml


Happy Quilting!


Penny Halgren
www.How-to-Quilt.com
Inspiration and Education for Beginning Quilters
www.Rag-Quilt-Instructions.com
Fast, Fun and Funky Quilts
www.Fabric-Postcards.com
Quilt Greetings Across the Miles


Friday, September 15, 2006


Greetings, Quilters-

We get.................

Questions from Quilters

Dear Girls,

Well I think you are young anyway, I have a recurring problem in that I never seem to cut my fabric straight no matter that I have the right equipment and so when I sew I always have something out of alignment. Please help me its driving me crazy.

Thanks sew much. Marie Burton from the land down under and you have my permission to print about me.


And we have.............
Answers for Quilters

To ensure that your quilt will be the shape you want it to be, your first cut must be straight on the cross-grain of the fabric (perpendicular to the selvedge). It’s easy, once you have folded your fabric properly for cutting and squared the edges:

  • Hold your fabric with the raw edges on top, allowing the selvedge edges to hang straight down to the floor.
  • Fold the fabric in half, right sides out, matching selvedge edges, and lining them up so they are straight and together. This is one of the most difficult parts, and it is amazing how much the cross-grain edge (the raw edges) can be off even though the cut appeared straight at the fabric shop.
  • This is also one of the most critical steps. If the selvedges are not lined up correctly, the strips will not be straight; there will be bends in the strips, and you won’t be able to make square squares – they will be misshapen.
As an extra step, check the bottom fold of the fabric, to be sure that there are no gaps or wrinkles there either.

Once your fabric is folded, and you are confident you will cut straight strips, lay it down (folded) on your cutting mat.

Fold your fabric again, lining up the bottom fold with the selvedge edge. Line up the folded piece of fabric on the mat with a horizontal gridline.

Make sure that the selvedges and folded edge stay even with each other, and line up your ruler with a vertical line on your cutting mat.

Move the ruler sideways until all of the raw edges are clear of the ruler and will be cut off. You will probably want to go about ¼” past the raw edge into the “good” fabric to make sure you catch all of the fraying threads.

After you cut the first strip, unfold it and hold it up to see if it is straight. If it has a bend re-fold the fabric, matching the selvedges again, cut a skinny strip to even the ends, then cut a new full-size strip and check again.

Visit: http://www.how-to-quilt.com/articles/6106-cutting-fabric-straight.shtml to see full color photographs of each of these steps.

Happy Quilting!


Penny is a quilter of more than 24 years who seeks to interest new quilters and provide them with the resources necessary to create beautiful quilts.

www.How-to-Quilt.com
Inspiration and Education for Beginning Quilters

This article courtesy of http://www.How-to-Quilt.com.
You may freely reprint this article on your website or in your newsletter provided this courtesy notice and the author name and URL remain intact.

©2006, Penny Halgren